Picture this: You have a design, a masterpiece that you want to showcase to the world in all its glory. But traditional printing methods just won’t cut it. Enter “sublimation” – the secret sauce that brings vibrant, eye-catching designs to life with unparalleled precision and brilliance.
Now, you might be wondering, “What on earth is sublimation?” Well, it’s not about turning solid into gas without passing through a liquid phase (though that would be pretty nifty). Sublimation, in the world of printing, is a process where ink transforms directly from a solid to a gas without becoming a messy liquid in between. This unique characteristic allows the ink molecules to embed themselves deeply into the material, resulting in images that seem to magically float on the surface, with no visible texture or fading over time.
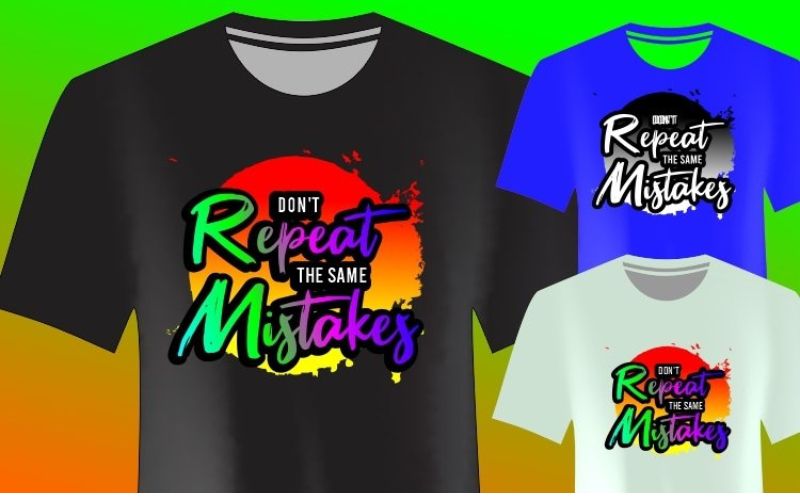
And the applications? Oh, they are as diverse as the colors in a rainbow! Sublimation has taken over the realms of apparel, home decor, promotional products, and even personalized gifts. From customized T-shirts that speak your mind to delightful mugs that hold your favorite brew, sublimation lets you add a personal touch to virtually anything.
Now, you might be wondering, why on earth would anyone want to sublimate on stainless steel? Well, my dear reader, let me tell you – it’s not just about a surface that’s as tough as nails (or tougher!). It’s about elevating your designs to a whole new level of elegance and sophistication.
You see, stainless steel isn’t just a boring piece of metal; it’s like a blank canvas, waiting for your creativity to transform it into a mesmerizing work of art. And boy, does it look good! Sublimating on stainless steel gives your designs a modern, sleek, and polished look that’s hard to ignore. It’s like dressing your art in a tailored tuxedo – classy, timeless, and impressive.
So, why not take a plunge into the world of stainless steel sublimation? Whether you’re a seasoned sublimation wizard or just dipping your toes into the magical inkwell, exploring this captivating material will surely take your artistic journey to uncharted territories.
Can You Sublimate Onto Steel?
Sublimation onto steel? Totally possible! But here’s the deal – remember that sublimation inks are head over heels for polyester. So, if you want to make your metal surfaces swoon with sublimated glory, give ’em a polyester coating first!
How, you ask? Easy peasy! The go-to move is powder coating – it’s like giving your steel a stylish makeover. Once coated, the sublimation magic can work its charm.
Now, let’s not get carried away like a bull in a china shop! Before going all-in, test the waters with a small area. Play it cool, see how the steel responds – ’cause, you know, metals have personalities too!
So, there you have it! Sublimating onto steel is like pairing strawberries with cream – a match made in heaven! Just remember the polyester embrace, and you’re on your way to dazzling designs that’ll make steel beams blush! 😎💨
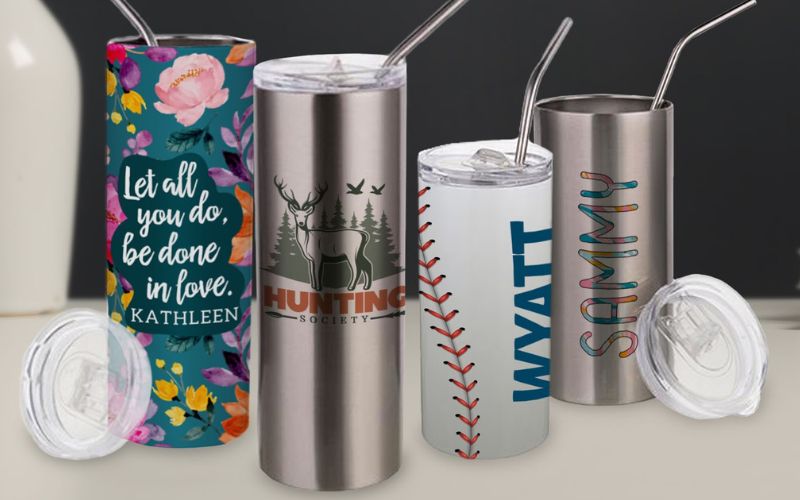
How to Sublimate Stainless Steel Tumblers: Step-by-Step Process
Required Material
- A stainless steel tumbler
- A heat press
- Sublimation paper
- Sublimation ink
- Heat tape
- Scissors
- Ruler
Sublimating stainless steel tumblers is easier than you think! Just follow these quick steps to get your designs shining in no time:
Step 1: Design and Image
Find or create your dream design, and don’t forget to reverse it for sublimation paper printing. Get those creative juices flowing!
Step 2: Resize the Image
Measure your tumbler’s dimensions and resize the image accordingly. Keep the aspect ratio intact to avoid distortion – nobody likes a squished design!
Step 3: Cutting the Design
Grab those trusty scissors and carefully cut out your design, leaving a tiny margin around the edges – a little breathing room never hurts!
Step 4: Applying the Design
Time for the heat press magic! Preheat it to 400°F, place the Teflon sheet on top for a seamless transfer. Position your tumbler and design perfectly, then press that heat press shut like a boss!
Step 5: Sublimating the Design
Tick-tock! Wait for the timer to hit the sweet spot – timing varies with tumbler size and design. Ding! Open the heat press, let it cool, and there you have it – your fabulous design on the stainless steel tumbler!
Extra Tips:
- Stick to sublimation-specific paper and ink for stainless steel tumblers – they’re a match made in heaven.
- If things don’t transfer right, tweak the heat press settings – temperature and time can work wonders.
- Safety first! Let the tumbler cool before handling to avoid ouchies.
- Handle with care! Gentle cleaning with a soft cloth and mild soap keeps your design beaming like a star!
Now go ahead, create your personalized stainless steel tumbler masterpieces and let them dazzle the world! ✨💨
Step-By-Step Process To Make Sublimation Prints More Vibrant
- Use the Right Printer: Make sure you have a sublimation printer like the Sawgrass printer, which offers software like Creative Studio for color adjustments.
- Choose High-Quality Settings: When printing, select high-quality settings to ensure clear and detailed prints.
- Select the Correct Color Mode: For more vibrant prints, choose the “Vivid” color mode instead of “Photographic” or others. Vivid mode saturates colors for a striking result.
- Check Print Manager: If using Silhouette Studio, print through the Print Manager with the selected Vivid color mode for accurate color reproduction.
- Set Correct Pressing Parameters: Before pressing the sublimation design onto the tumbler, ensure you have the correct temperature and time settings. These may vary depending on the tumbler and ink used.
- Test and Adjust: If the first print doesn’t meet your expectations, experiment with different color modes, printer settings, and pressing parameters to find the perfect combination.
- Use Quality Sublimation Paper and Ink: To achieve the best results, always use sublimation-specific paper and ink designed for stainless steel tumblers.
Remember, making sublimation prints more vibrant is a combination of correct settings and experimentation. With a bit of trial and error, you’ll find the sweet spot for creating stunning, eye-catching sublimation designs!
Washing Tips For Sublimated Stainless Steel Tumbler
Washing your sublimated stainless steel tumbler is a breeze:
- Use mild soap and water for a gentle clean.
- Skip the abrasive stuff – opt for a soft cloth to wipe it clean.
- Let it air dry completely before storing – patience pays off!
- Keep it out of the dishwasher to protect that fabulous design.
That’s it! Easy-peasy, lemon-squeezy! 🍋🚿
Step-By-Step Process To Sublimate A Photo Onto A Stainless Steel Sheet
Step 1: Gather Materials
- Obtain a stainless steel sheet in the desired size for your artwork.
- Ensure you have a high-quality photo or design ready to be printed using dye sublimation.
Step 2: Prepare the Photo
- Use graphic design software (e.g., Adobe Illustrator or Photoshop) to create or resize the photo to fit the stainless steel sheet.
- Make sure the image is in the correct dimensions for sublimation.
Step 3: Set Up the Printer
- Open the Print Manager software for your dye-sublimation printer (e.g., SG500 or SG1000).
- Select the appropriate settings, such as paper size and quality.
Step 4: Load the Printer
- Load the dye sublimation paper into the printer’s tray.
- Ensure that the image is correctly aligned on the paper, so it will transfer accurately onto the stainless steel sheet.
Step 5: Secure the Image on the Stainless Steel Sheet
- Place the stainless steel sheet on a flat, heat-resistant surface.
- Carefully position the dye sublimation paper with the image face-down on the stainless steel sheet.
- Use heat-resistant tape to secure all four edges of the paper to the stainless steel sheet, ensuring it doesn’t move during the sublimation process.
Step 6: Preheat the Heat Press
- Preheat the heat press to the appropriate temperature for dye sublimation on stainless steel (usually around 400 degrees Fahrenheit).
Step 7: Sublimation Process
- Place a Teflon sheet on the bottom platen of the heat press to protect it from any ink transfer.
- Carefully place the stainless steel sheet with the attached paper face-down on the Teflon sheet.
- Cover the stainless steel sheet with another sheet of paper or Teflon to protect the upper platen of the heat press.
Step 8: Apply Pressure and Heat
- Close the heat press and apply medium to firm pressure.
- Set the timer for the required sublimation time (usually around 90 seconds).
Step 9: Remove the Transfer Paper
- When the timer goes off, open the heat press carefully.
- Use heat-resistant gloves to remove the stainless steel sheet with the transferred image.
- Immediately peel off the transfer paper while the stainless steel is still warm, ensuring a successful “hot peel.”
Step 10: Final Inspection and Mounting
- Inspect the transferred image to ensure it looks vibrant and shiny on the stainless steel sheet.
- If satisfied, you can now mount the custom metal art piece on a wall using command strips or other appropriate mounting methods.
With these steps, you can create stunning custom metal art pieces by sublimating photos or designs onto stainless steel sheets using dye sublimation.
FAQs
Can I use any type of paper to sublimate on a stainless steel tumbler?
No, you need to use sublimation paper explicitly designed for sublimating on stainless steel tumblers. Regular paper won’t cut it!
What type of ink should I use?
For the best results, use sublimation ink specially made for sublimating on stainless steel tumblers. Don’t settle for anything less!
Why does my sublimation look faded on the Tumbler?
There could be a couple of reasons for this. First, ensure you’re using the right sublimation paper and ink – mismatched materials lead to faded outcomes. Second, check if you correctly resized the image. Maintaining the original aspect ratio is crucial to avoid distortions.
Conclusion
In conclusion, dye sublimation offers a remarkable and creative way to personalize and beautify stainless steel sheets, transforming them into stunning custom metal art pieces. With the right equipment, such as the SG500 or SG1000 dye-sublimation printers, and proper preparation, it is possible to achieve vibrant, long-lasting, and scratch-resistant prints on stainless steel.
The step-by-step process outlined in this blog demonstrates the simplicity and effectiveness of the sublimation technique, allowing for a wide range of applications, including decorative pieces, personalized gifts, and even commercial products. So, whether you’re looking to adorn your living space with unique artwork or seeking an innovative way to showcase special memories, sublimating on stainless steel can elevate your creativity to new heights. Embrace the versatility of dye sublimation and explore the endless possibilities of turning plain stainless steel sheets into captivating metal masterpieces.